Butterfly Blossoms & Welcoming Spring Bulletin Board Idea
By Kayla • April 3, 2018

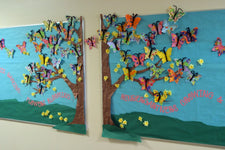
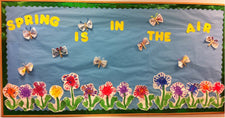
This gorgeous spring bulletin board comes from Marilyn Healey, artist, mother and creator of the blog, Outside the Lines. Originally designed for her daughter's kindergarten class, the beautiful color palette and whimsical portrayal of the season make it a spring must-have for the early childhood classroom. Plus {as is always appreciated!}, your students get to help!
Spring Butterfly Collage
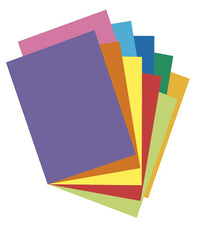
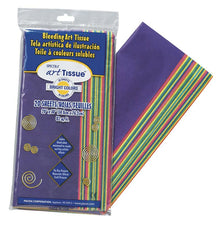
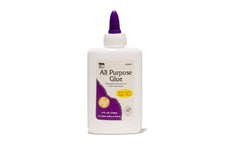
Starting with a card stock template, invite your students to trace and cut a butterfly shape from colored card stock. You might also consider finding a black and white template or print online to be printed directly onto the colored card stock and cut out. This completed, provide students with torn pieces of art tissue paper in assorted colors along with a shallow dish of mod podge (or watered down glue) and have them collage their cutout with the colorful scraps. Consider providing them with fine iridescent glitter to sprinkle onto the wet collage before it dries (optional). Setting the butterflies aside to dry, give each of your students a brown chenille stem, demonstrating how to fold the stem in half, create a tight twist about three inches from the bend, and curl both free ends to fashion a butterfly body. Invite your students to glue the shaped chenille stem to the center of the butterfly cutout and add any finishing touches (i.e. a glitter glue border around the edge of the butterfly wings, etc. if desired).
Butterfly Blossom Bulletin Board
- Background: Cover the top three-fourths of the board with light blue bulletin board paper and the rest with green background paper {cut with wavy, uneven strokes} to create a landscape - grass and sky.
- Title: "Butterflies Dancing... Flowers Blooming... Kindergartners Growing & Learning" - Marilyn crafted the title using a personal cutting machine, but you could also use traditional lettering. The font will likely be larger so you may have to tweak the title, but the results will be the same!
- Border: None.
- Decoration: 1) The Tree. Draw or enlarge and trace the shape of a barren tree onto brown background paper. Once cut, scrunch the paper to give it a "rough" texture and appearance, then mount the cutout to the center of your board. {Marilyn originally decorated two boards that were side-by-side, choosing to split the tree in half, but this will not be necessary in most cases.} To make the tree fit 'seamlessly' into the backdrop, add a second much smaller/thinner strip of green background paper along the bottom of the board. 2) The Butterflies. Attach your students' colorful creations in and around the tree branches. 3) The Flowers. Purchase silk daffodils from your local craft supply store or consider making your own {you can find a great tutorial from Good Housekeeping for paper daffodils here - just skip the napkin ring step!}, attaching these to the branches of the tree and scattering some throughout the "grass".
While the design is nothing particularly new or groundbreaking, the elements work so well together that this is definitely one of our favorites for this year's {or next year's via the inspiration folder} spring decor!
Thanks so much for stopping by! We'd love to hear how you plan to decorate your classroom for spring, so be sure to leave us a comment below!
About the Author

Kayla Johnson


Disclaimer: The content on this page is for informational purposes only and reflects the author's personal experiences and/or opinions. The author is not a financial advisor, medical professional, or licensed expert in any regulated field. Nothing on this page should be interpreted as financial, medical, or professional advice. This content is not a substitute for professional advice, diagnosis, or treatment.
Always consult a qualified professional before making decisions related to your finances, health, or other personal matters. The information provided here is shared in good faith, but individual circumstances vary, and what works for some people may not work for you. Results are not typical, implied, or guaranteed. While we strive for accuracy, information may become outdated or change over time. Statements made by guest authors reflect their own opinions and should not be interpreted as endorsements by SupplyMe.
Some of the links on this page may be affiliate or referral links, which means we may earn a commission or bonus if you use them. There’s no extra cost to you — and it’s a great way to support the site if you find the content helpful.