Making Fall Prints with Painter's Tape
By Kayla • April 3, 2018
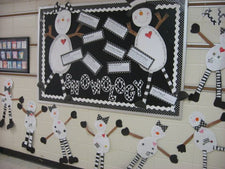
Most preschoolers haven't mastered drawing complex shapes or objects so when it comes to art projects, in most cases, the simpler the better. Allie of No Time for Flash Cards has found a great way to incorporate both simple and complex art tasks. She uses the example of a fall tree, but this can be tailored to meet any season, occasion, lesson, or unit!
Supplies You'll Need
- Canvas
- Round sponge paint brush
- Craft paint
- Blue painter's tape
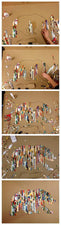
Begin the activity by 'taping off' the the shape of the desired print. In Allie's example she used the tape to create a fall tree including its trunk, branches, and leaves (both on the tree and falling to the ground). For a fall themed project you could also try a simple leaf print, a pumpkin, or even a scarecrow. Whatever you decide, make sure you press hard when applying the tape to the canvas so that paint doesn't have a chance to seep under it.
Set out several shallow dishes filled with craft paint in assorted fall colors including green, yellow, orange, red, and brown. Invite your students to dip their round sponge brushes into the paint, then lightly press it to the canvas. Invite them to practice blending or even patterning as they fill the space around the painters tape. When finished, set them aside to dry. Then, when you're sure the paint has set, pull the painters tape off to reveal a neat fall print!
About the Author

Kayla Johnson


Disclaimer: The content on this page is for informational purposes only and reflects the author's personal experiences and/or opinions. The author is not a financial advisor, medical professional, or licensed expert in any regulated field. Nothing on this page should be interpreted as financial, medical, or professional advice. This content is not a substitute for professional advice, diagnosis, or treatment.
Always consult a qualified professional before making decisions related to your finances, health, or other personal matters. The information provided here is shared in good faith, but individual circumstances vary, and what works for some people may not work for you. Results are not typical, implied, or guaranteed. While we strive for accuracy, information may become outdated or change over time. Statements made by guest authors reflect their own opinions and should not be interpreted as endorsements by SupplyMe.
Some of the links on this page may be affiliate or referral links, which means we may earn a commission or bonus if you use them. There’s no extra cost to you — and it’s a great way to support the site if you find the content helpful.